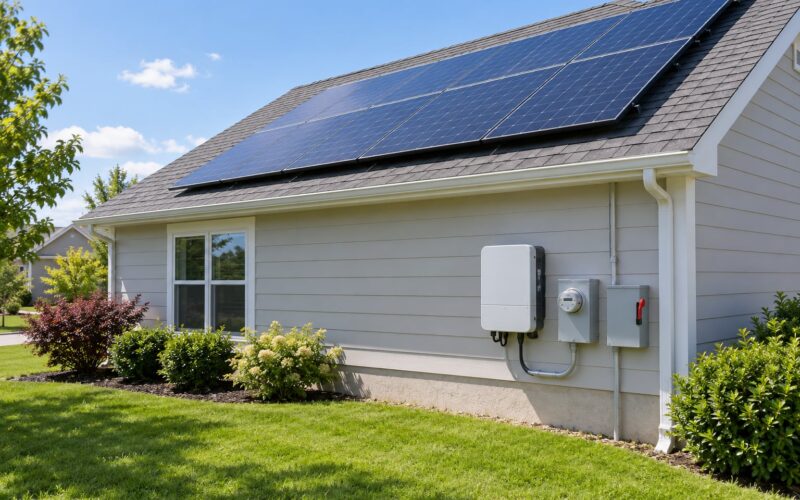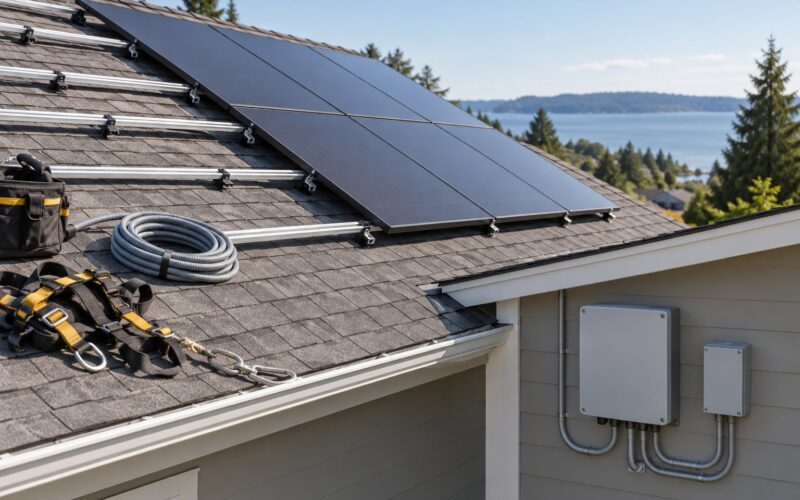
If you want the plain answer to how solar panels are mounted to a roof: they are not glued, screwed straight into shingles or left loose on the surface. They are clamped to aluminium rails, and those rails are anchored to the building itself — normally by lag bolts driven through the roof deck into the rafters and sealed with flashing, or by clamps onto standing seams, tile hooks, or ballast weight on a flat roof. That anchor point is the only part of the system that touches your house, and it decides whether the roof stays watertight.
The mechanics matter more than most people expect. A roof-mounted solar array adds roughly 2 to 4 pounds per square foot of dead load on top of whatever the roof already carries, and it has to resist wind uplift at the edges and corners where pressure is highest. Get the attachment right and the array can sit on a roof for 25 years. Get it wrong and you get a slow drip inside a wall cavity that nobody finds until it rots.
Here is the whole process, in the order it actually happens, plus the four mounting families and the mistakes that cause most of the leaks.
Table of Contents
- What You Need
- Step-by-Step: How Solar Panels Are Mounted to a Roof
- 1. Plan How Solar Panels Are Mounted to a Roof
- 2. Choose the Mounting System
- 3. Mark and Prepare the Attachment Points
- 4. Install the Roof Anchors and Flashing
- 5. Attach the Rails and Panels
- 6. Connect and Test the Electrical System
- 7. Inspect the Finished Installation
- Common Mistakes
- Frequently Asked Questions
- Can you mount solar panels directly to the roof?
- How common are roof leaks with solar panels?
- Can I install solar panels myself?
- Do solar panels void my roof warranty?
- How do I know if my roof can hold solar panels?
- What happens when the panels are eventually removed?
- Conclusion
What You Need
Before anything is unbolted, an installer needs the design in hand. That starts with a scaled array layout showing how many panels go on which roof plane, which rail runs where, and how far the array sits from the roof edges, chimneys and vents.
Next come the roof facts: age and condition of the shingles, the roof pitch, rafter size and spacing, and whether anything is already penetrating the deck. If your roof is near the end of its life, re-roof first. Nobody wants to tear off a fifteen-year-old array to replace the membrane underneath it.
Then the paperwork. Most jurisdictions require a building permit for the structural attachment and a separate electrical permit for the wiring, plus utility approval to connect. Fire setback rules dictate how close the array can come to the roof edge, and those are code, not preference.
You will also need the hardware: rails or rails-and-hooks, L-feet or seam clamps, lag bolts, flashing, mid and end clamps, an earth or bonding clamp, and a roof-mounted cable run. Sealant and a torque wrench round it out.
And you need the right people. Rafter loading and penetrations are structural work. Wiring an inverter, tying conductors together and grounding the array are electrical work that requires a licensed electrician under the electrical code. Where you have more than one flat roof plane, more than about 25 feet of roof run, or any doubt about rafter capacity, the answer is an engineer who signs off in writing. NABCEP certification is the credential most worth asking about.
Step-by-Step: How Solar Panels Are Mounted to a Roof
Every install follows the same arc: survey, choose hardware, find the structure, drill and seal, build the rails, clamp the modules, wire and ground, then inspect. The order does not change much between mounting families — what changes is how the rail is held to the roof and how the waterproofing detail is made.
1. Plan How Solar Panels Are Mounted to a Roof
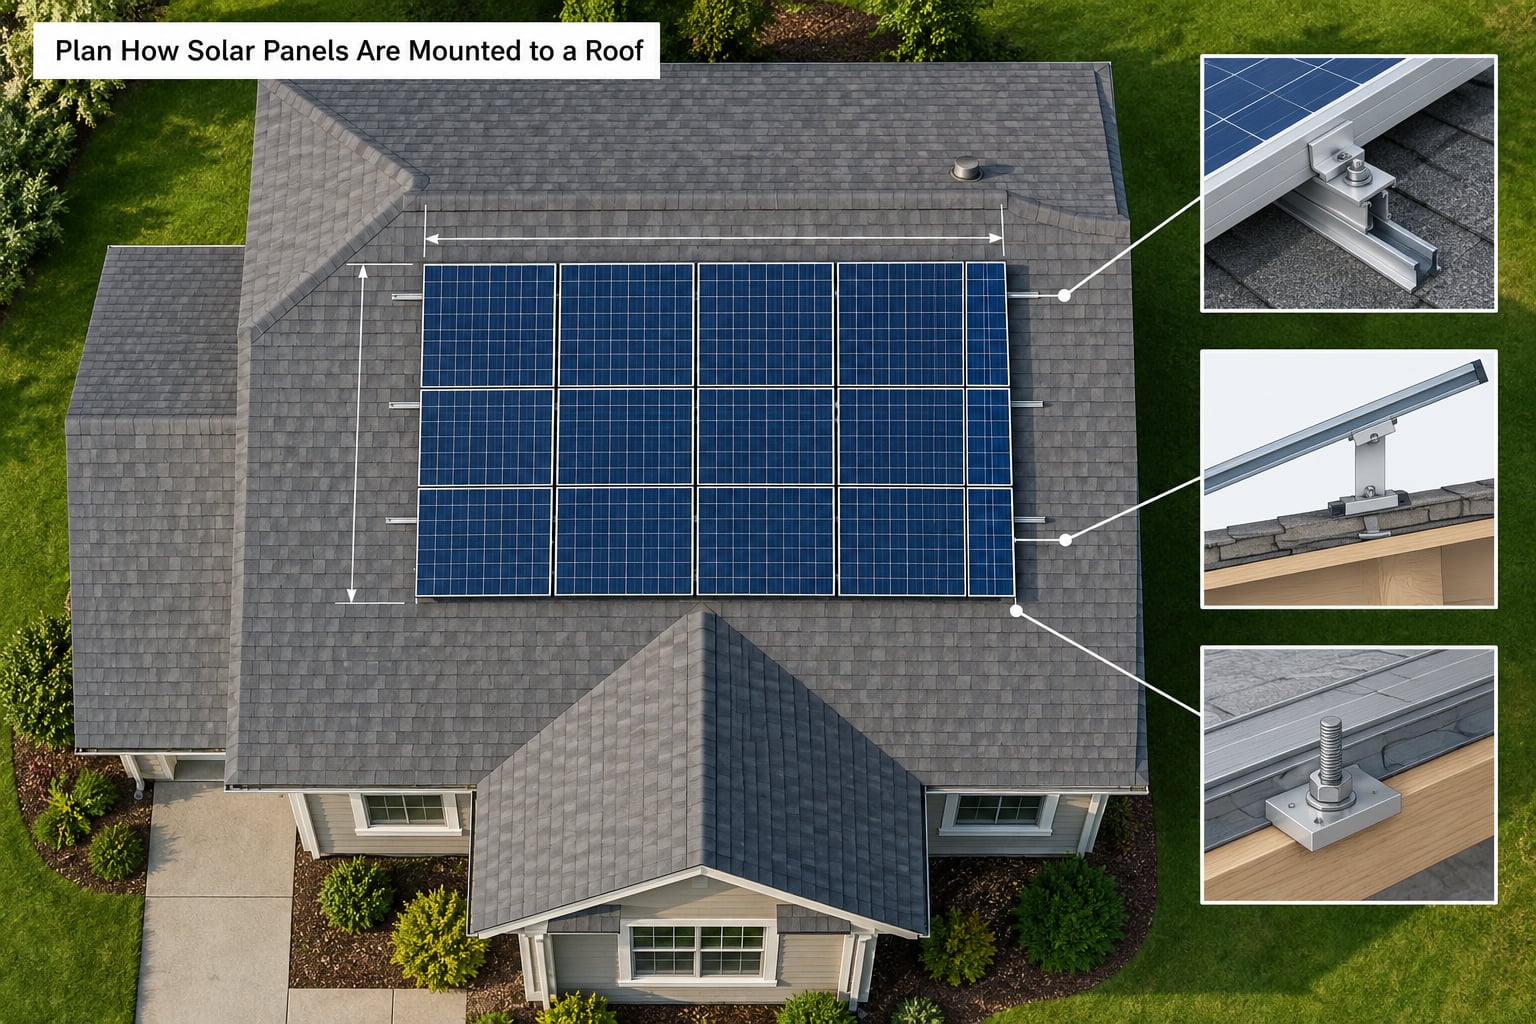
The planning stage decides whether this roof is a candidate at all. An installer checks how old the roof is, how many layers of shingles are on it, and whether there is room to set panels down without shading them from one another in winter.
Orientation and shading are the two output killers. A south-facing plane in most of the US is ideal, but east and west faces produce a usable, if less productive, profile. Shade from a chimney, a vent stack, a neighbouring roofline or a tree that grows into the panel by 10am will cost you more than any hardware choice on this list.
Then comes structure. Rafters need to be long enough for the planned rail run and thick enough for the added dead load plus code-required snow and wind loading. Older homes with 2×4 rafters at 24 inches on centre, or retrofits where the rafters were cut for a chimney or a bathroom vent, need closer attention. Mounting into a sheathing panel because the rafter is inconvenient is the single most common structural error I hear about, and experienced DIYers repeatedly stress the same rule on r/solar and solar-electric: mounts land on rafters.
Finally the electrical path. Where does the conduit run, where does the inverter sit, how far is the disconnect from the array. Doing this on paper costs nothing and saves drilling panels off later.
2. Choose the Mounting System
There are four families of solar panel roof attachment, and the roof covering picks between them more than taste does.
- Flashed penetration mounts — the default on asphalt shingle. A lag bolt passes through the deck into a rafter, and a piece of flashing seals the hole.
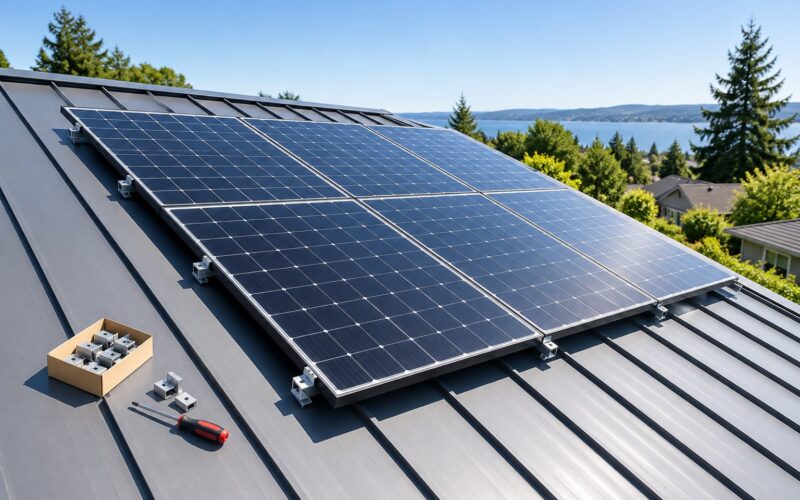
- Standing seam clamps — bolted to the raised seam of a metal roof, so the roof is never drilled. Genuinely penetration-free.
- Tile hooks — a shaped hook fixed to the rafter, with a base plate or tile replacement tile that spreads the load. Built for clay and concrete tile.
- Ballasted mounts — the array’s own weight holds it down on a flat membrane roof, with tilted legs and no penetration at all.
Matching roof type to mount type is not a detail you can improvise:
| Roof covering | Typical mounting method | What makes it work | Watch out for |
|---|---|---|---|
| Asphalt shingle | Flashed penetration into rafters | Flashing slides under the shingle course above the bolt | Age of shingles, rafter spacing, hidden damage |
| Standing seam metal | Non-penetrating seam clamps | Clamp sized to the seam height, bolt torque set by the roof maker | Seam spacing narrower than the array width |
| Clay or concrete tile | Tile hooks with base plate or replacement tile | Load spread over the tile so it does not crack | Brittle old tile, mortar bed condition |
| Flat membrane (TPO, EPDM) | Ballasted tilted mounts or flashed penetrations with a curb | Ballast holds rotation down; penetrations get a membrane collar | Wind uplift at edges and corners, membrane warranty |
| Wood shake | Flashed penetration, sometimes over a batten detail | Flashing sits under the shake above the bolt | Fragile surface, ongoing shake replacement |
On flat roofs, ballasting shifts the weight question rather than removing it. A residential ballasted array commonly needs somewhere around 3 to 5 pounds per square foot of added load once panels, rails and ballast blocks are counted, and the wind design is what really drives the number — a corner module sees uplift forces several times what the middle of the array sees. Ballast also concentrates that weight over the membrane, which matters for a roof that was never designed for a point load. That calculation belongs to an engineer.
Panels also sit a few inches above the roof rather than flush against it, and that air gap is deliberate. It lets air move under the array, keeps stucco and adhesives away from hot metal, gives water from a storm somewhere to drain instead of running along a rail, and gives snow a place to slide.
3. Mark and Prepare the Attachment Points
Now the installer finds the structure. Rafters are located with a stud finder or by measuring from identifiable features like a chimney or a gable vent, then confirmed with a small exploratory hole in the attic. On a roof with trusses, the bottom chords are the target. The rule that matters: every mount lands in the centre of a rafter, or in framing that an engineer has approved, never in bare sheathing.
Layout also fixes clearances. Panels need breathing room at the array edges for fire access, they need to stay clear of vents and skylights, and the rail runs need to avoid conflicts where two rails would meet awkwardly. Every extra penetration is another potential leak, so a good layout attaches to every second rafter where the hardware and engineering allow it, halving the number of holes in the roof.
The deck around each bolt location gets cleared of granules and debris, and a pilot hole is drilled slightly undersized so the lag bolt threads rather than splits the wood.
4. Install the Roof Anchors and Flashing
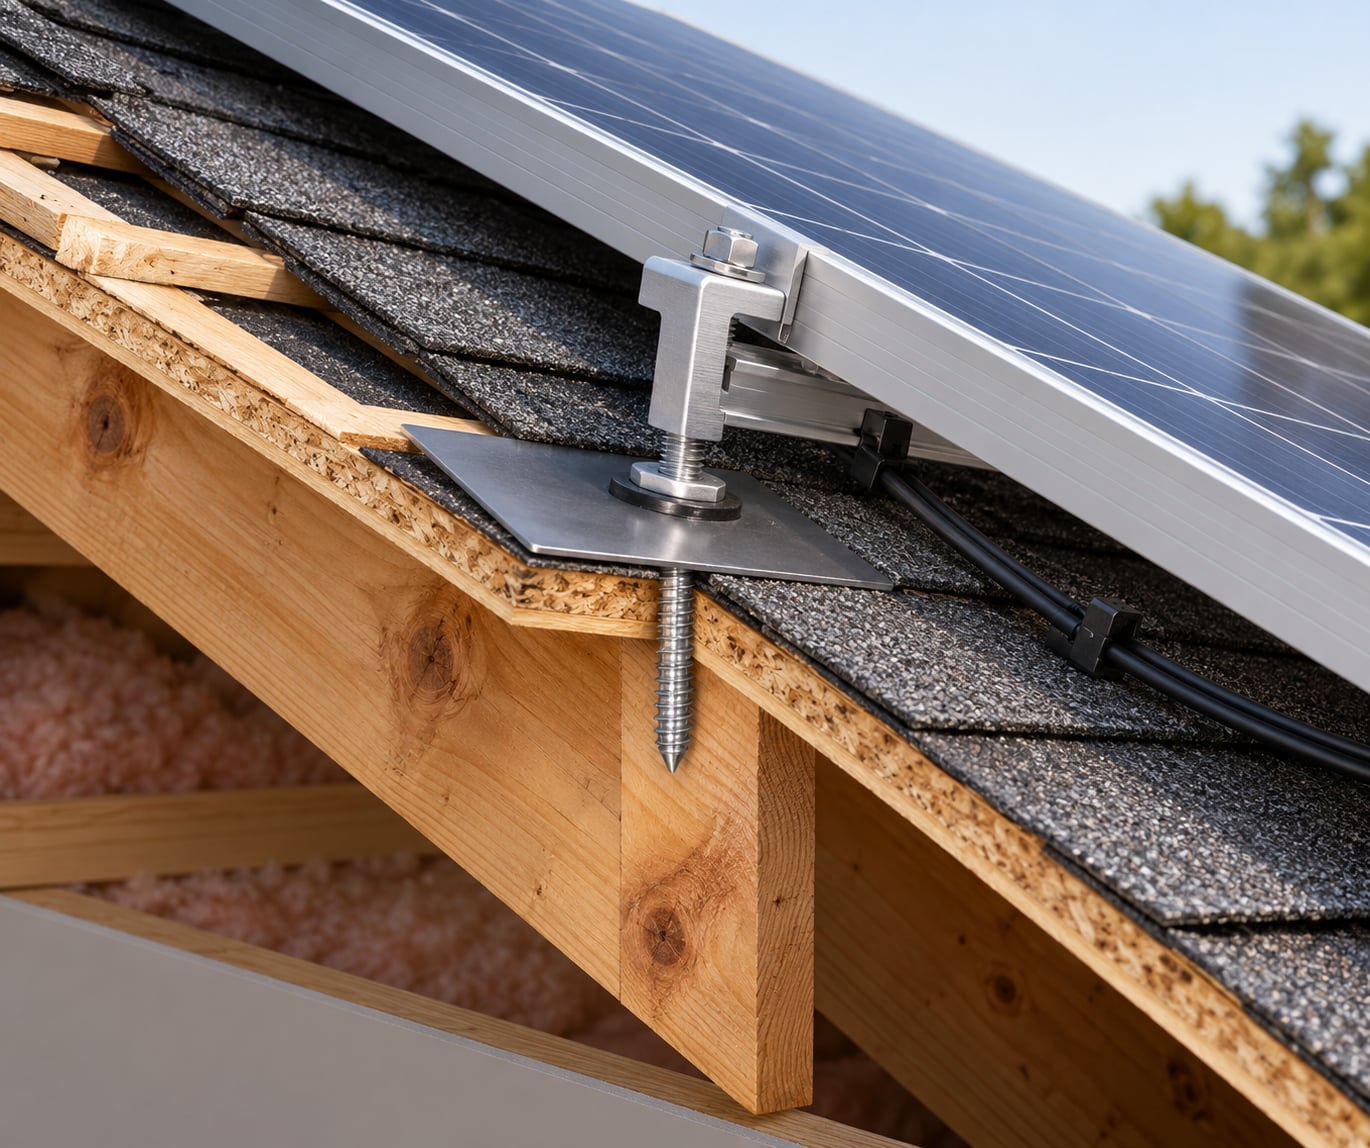
This is the step that separates a roof that lasts thirty years from one that drips, and it is the part of how solar panels are mounted to a roof that most people get wrong. The lag bolt — commonly a 5/16-inch hex-head stainless lag for shingle roofs — goes through the L-foot, through the flashing, through the sheathing and into the centre of the rafter.
The flashing goes in first, not after. For asphalt shingles, the standard detail is to lift the course of shingles above the bolt, slide the flashing or a step flashing under it so the shingle course laps over the top of the flashing, then seal the sides with butyl sealant. Water running down the roof follows the shingle course onto the flashing and out over the bolt head instead of into the hole.
Sealant alone is not a flashing detail. Caulk shrinks, cracks and weathers out, and anyone who has pulled apart a failed mount will tell you the drip usually starts where the hole was, not where the panel was. Butyl tape or butyl-based sealant under the flashing and a dab at the bolt head finishes the detail, and the shingle lap is what does the real work.
Bolts are tightened with a calibrated torque wrench to the mounting system’s published figure rather than by feel. Over-tightening crushes the flashing and cracks the rafter end; under-tightening lets the array work itself loose under wind cycling.
5. Attach the Rails and Panels
Rails bolt to the L-feet and get squared. Where two rail sections meet, they are joined with a rail splice or connector, and a small gap is deliberately left in the rail — a thermal expansion gap. Aluminium moves several millimetres over a long run across a summer, and a rail spliced solid will buckle.
Modules then drop onto the rails and get clamped. Mid clamps hold panels in the middle of the rail, end clamps hold the outer edges, and an earth clamp bonds the module frames together for equipotential bonding so the whole array sits at the same electrical potential as the grounded racking. Clamp position matters: outside the clamp zone the frame manufacturer wants, panels can flex and micro-crack under wind.
Cables get clipped to the rails with UV-resistant clips or run through a roof conduit, so nothing lies across a shingle course where it abrades. Snow guards go on above panels in areas that get real winter loading, because a panel releasing a slab of wet snow becomes a projectile at whatever is downhill.
Every torque spec here comes from the panel and mounting-system documentation, and those differ between manufacturers. Follow the hardware you actually have.
6. Connect and Test the Electrical System
Strings run from the module junction boxes, through the roof penetration and conduit to a combiner or straight to the inverter. Grounding and bonding are checked so there is a clear fault path, and rapid shutdown devices are fitted where the code requires them, typically at the module level.
This is licensed electrical work. String sizing, conductor gauge, overcurrent protection, disconnect placement and the utility interconnection agreement all carry code requirements, and the array has to pass inspection before the utility will let it run in parallel with the grid. If you are not qualified to do this part, that is not a gap in your project — it is the point where you hand it over.
7. Inspect the Finished Installation
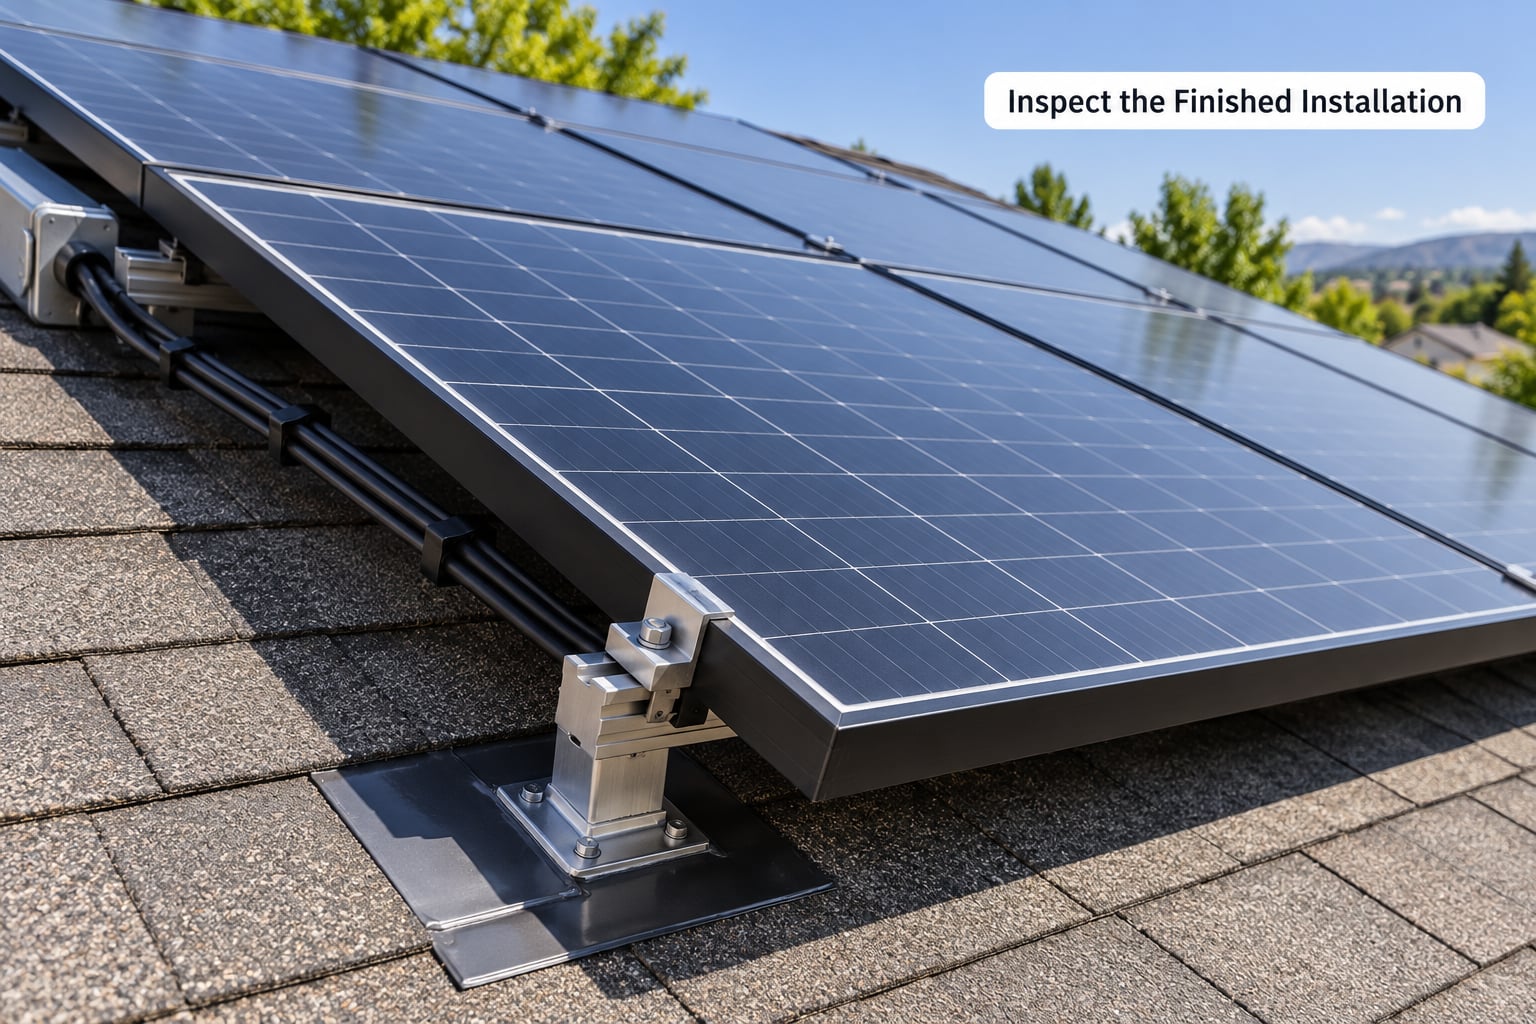
Before the panels go on, the mounts get photographed from several angles, because once the array is down the hardware is invisible. That photo record is the single most useful thing a homeowner can end up with, and it is worth asking for in writing as part of the job.
After installation, the checks are visual first. Look for panels that are out of square, rails that are twisted, clamps that sit outside the frame’s clamping zone, and cables lying where wind will rattle them. Confirm the torque marks on the fasteners, confirm each flashing is lapped under the shingle course above it, and confirm the bonding run is continuous.
Then run water over it. A hose test on each penetration and flashing detail after the first good rain — or before one — turns an invisible problem into a visible drip while the installer’s workmanship warranty is still live. Keep the roof under observation through at least one heavy rain before you consider the job closed.
Finally, confirm the paperwork: permit sign-off, electrical inspection, utility permission to operate, and a written workmanship warranty that is separate from the roof warranty. Local building authorities inspect the structural attachment; the utility inspects the interconnection. Both should be on file.
Common Mistakes
Leaks reported on solar forums almost always trace back to one of these, and almost never to the panel itself. Workmanship varies more than product quality does.
Mounting into sheathing instead of a rafter. Plywood and OSB sheathing is not designed to carry a bolt in tension. Find the framing and drill into it, or get an engineered detail.
Skipping the flashing or sealing with caulk alone. Flip the order — flashing goes under the shingle course above the bolt, sealant is the secondary detail.
Over-torquing the lag bolts. It feels more secure and it crushes the flashing and splits rafter ends. Use a wrench set to the published figure.
Under-torquing instead. The looser mistake is quieter: the array rattles under wind cycling and an anchor walks out of the flashing months later.
Missing rafters on a retrofit. A previous bathroom vent or chimney cut can leave nothing structural where the layout wants a mount. Move the panel or call for an engineered mount.
Ignoring thermal expansion. Spliced rails with no gap buckle in summer heat and can distort the array.
Mixed racking components. Clamps, rails and mid clamps from different systems are a warranty question as much as a strength question, and they complicate a partial re-roof years later.
Poor cable management. Cables stretched across shingles wear through, and a chafed conductor under a clamp is a fault waiting for weather.
Skipping the photo record and the water test. Not a physical mistake, but it turns a small warranty claim into an argument about a penetration nobody can see.
Frequently Asked Questions
Can you mount solar panels directly to the roof?
Almost never straight into shingles. Panels are clamped to aluminium rails, and the rails attach to the structure — lag bolts through the deck into rafters with flashing, seam clamps on standing seam metal, tile hooks on tile, or ballast weight on a flat roof. The roof covering is never the load-bearing surface, and going direct is the most common way people cause leaks.
How common are roof leaks with solar panels?
Leaks do happen, and the pattern is consistent: they trace to flashing, sealant or a mislocated penetration rather than to the panel or rail. Almost all of them appear within the first year, often after heavy rain. Ask for photos of each flashing detail before the panels cover them, and run a hose test after the first soak while the workmanship warranty is active.
Can I install solar panels myself?
You can plan, measure, mark layout and even drill pilot holes with care. What you should not do alone is structural attachment to rafters on anything but a simple, well-documented roof, and you should not touch the DC wiring, grounding or grid connection at all — those are licensed electrical work under code. Expect to need a permit either way.
Do solar panels void my roof warranty?
Sometimes, and it depends entirely on who drilled the holes. Many roofing manufacturers exclude penetrations made by a third party after the roof was installed, so get the roofing manufacturer’s position in writing before work starts, and use a written workmanship warranty from the installer to cover what the roofer will not. Some installers will coordinate with your roofer for exactly this reason.
How do I know if my roof can hold solar panels?
You need rafter size, spacing and length, plus roof age and condition. A qualified installer confirms framing locations from the attic, checks that the planned rail run fits between the eaves and ridge, and adds the array’s dead load — roughly 2 to 4 pounds per square foot — on top of existing snow and wind loads. Unclear framing or a heavy snow region means a structural engineer’s sign-off.
What happens when the panels are eventually removed?
Rails unbolt and come off. Flashed penetrations get filled with an aluminium or roofing sealant and a dab of shingle cement, and shingle manufacturers make repair patches for exactly this. Standing seam mounts leave nothing at all, since nothing was drilled. The bigger problem is practical: matching a replacement clamp or rail to a system bought years earlier can be hard, so record the brand and part numbers now.
Conclusion
Start by having the roof and the planned array assessed by a qualified solar installer, and get the framing picture confirmed from the attic before anything is ordered. From there the job is mechanical: pick the mounting family that matches your roof covering, land every anchor in approved framing, lap the flashing under the shingle course above the bolt, torque to the manufacturer’s figure, and photograph each detail before panels hide it. That is how solar panels are mounted to a roof in a way that outlasts the panels themselves.
This guide was checked against current mounting practice in 2026, and installation details vary by roof type, hardware system and local code, so treat it as background before you talk to an installer.