Most solar lights that stopped working fail for one of three reasons: the panel is dirty or shaded, the rechargeable battery has worn out, or the switch is sitting in the wrong position. Nine times out of ten the fix takes under ten minutes and costs nothing but a cloth and a few days of sunlight. You will need to open the housing for some of these steps, so if your light is still under warranty, check with the seller before you do.
Work through the steps below in order, cheapest and easiest first. If you want to know which cause matches what you are seeing, the note under each step tells you how to confirm the fix worked.
Table of Contents
- What You Need
- Step-by-Step: How to Fix Solar Lights That Stopped Working
- 1. Check the power switch and light mode
- 2. Clean the solar panel and remove obstructions
- 3. Place the light in direct sunlight
- 4. Inspect the battery compartment and contacts
- 5. Test the battery and replace it if needed
- 6. Check the sensor, switch, and wiring
- 7. Reset the light and test it overnight
- Common Mistakes That Prevent Solar Lights from Working
- Frequently Asked Questions
- How do you reset solar lights?
- How long do solar light batteries last?
- Can I use regular AA batteries in solar lights?
- Why are only some of my solar lights working?
- Why won’t my solar lights turn on after rain?
- Conclusion
What You Need
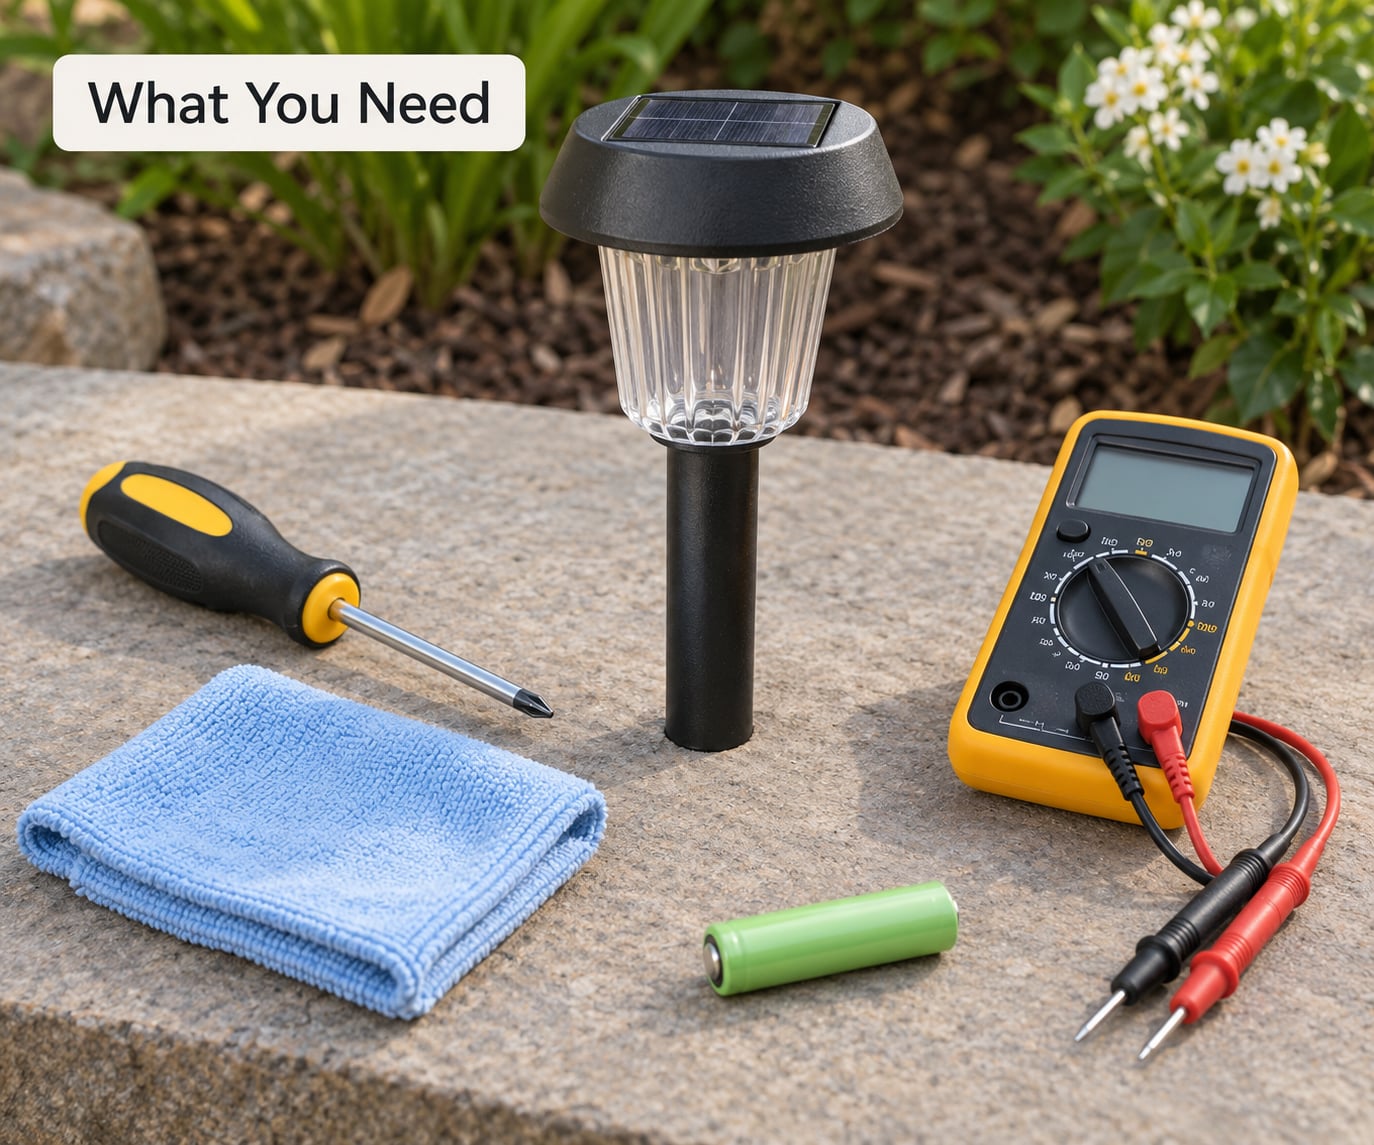
Gather these before you start. Most repairs need only the first two.
- A soft cloth or cotton pad, plus a small bowl of water and a drop of white vinegar for panel and contact cleaning
- A flat-head or Phillips screwdriver, usually the only tool required to open the housing
- A soft-bristled toothbrush or nylon brush to lift corrosion off battery terminals
- A multimeter or a battery tester, useful only if you want to confirm whether the cell or the panel is dead
- A replacement rechargeable battery, matched to the chemistry and voltage printed inside the compartment
- Clear silicone sealant for resealing a housing you opened, plus contact cleaner for corroded terminals
- Rubber gloves and eye protection if a battery looks swollen or has leaked
Work outdoors in daylight, keep the light unplugged from nothing at all (these lights have no cord), and never work on a fixture that is still in direct sun while open. If you find wiring that runs inside a wall or underground, leave it to an electrician rather than opening it further.
Step-by-Step: How to Fix Solar Lights That Stopped Working
These seven steps are ordered by how often the problem turns out to be that step, and by how much effort it costs you. Stop as soon as the light behaves normally again.
1. Check the power switch and light mode
Most solar lights have a small switch on the bottom, the back, or under a sliding cover. It usually has OFF, ON, and sometimes AUTO positions. Slide it through every position and leave it on ON or AUTO for the test.
New lights often ship with a thin insulating tab between the battery and its contacts. Pull it out; if you leave it in, the light is dead no matter how long it sits in the sun.
A light with a mode button may be stuck on a colour mode, and a remote-controlled light may need its remote reset. Covering the sensor or pressing the button for 10 to 15 seconds usually clears that.
How to tell it worked: cover the solar panel with your hand. A live light should click on within a second or two.
2. Clean the solar panel and remove obstructions
A film of dust, a layer of leaves, bird droppings, or a spider web across the panel cuts charging short before anything else fails. Wipe it with a damp soft cloth, and use the vinegar-and-water mix for stubborn grime, then dry it.
Never use a scouring pad, a razor blade, or a scraper. Tiny scratches on the photovoltaic layer are permanent, and they cut output for the life of the light.
Check for physical damage too: a cracked or cloudy panel, or a panel that sits loose in its housing, will not charge properly and usually cannot be fixed.
How to tell it worked: put the light in full sun with the panel facing the sky, switch to ON, and cover it after an hour. It should light, dimly at first.
3. Place the light in direct sunlight
Several days of full, unobstructed sunlight can revive a light that looked completely dead, especially one that has been sitting under a hedge, behind a wall, or inside a shed. Move it somewhere it sees the sky all day, then wait.
Shade is the sneakiest cause. A stake light pushed down into a shrub bed, a lantern on a table under a patio umbrella, or a string light mounted under an eave gets a fraction of the light it was designed for. The sun angle also shifts through the year, so a spot that was clear in summer can sit in shadow by autumn.
Do not charge through a conservatory or greenhouse window. Glass filters out the light the panel needs, and the light never gets a proper charge.
How to tell it worked: after two or three clear days, cover the panel at dusk. A healthy light holds steady brightness for most of the night rather than fading after an hour.
4. Inspect the battery compartment and contacts
Unscrew or unclip the base and lift out the battery. Look for a white, green, or crusty blue-green deposit on the terminals and inside the holder. That is corrosion, and it insulates the cell from the contacts, so the light behaves as if no battery is installed.
Scrub the corrosion off with the toothbrush dipped in the vinegar and water solution, rinse with a little water, and dry completely. Then a light film of contact cleaner on the terminals and the springs. Nail polish works too; it seals a cleaned contact against fresh moisture for another season or two.
Check for anything green or white leaking from the battery itself, and check that the wires inside are still attached to their terminals. If the compartment is full of water, dry it out, find the crack in the housing, and reseal it with silicone before you close it up.
How to tell it worked: the terminals should look like clean metal, and the battery should sit firmly against them with no wobble.
5. Test the battery and replace it if needed
A rechargeable cell usually lasts 300 to 500 charge cycles, which on a light running six hours a night works out to roughly two to three seasons. After that it holds far less charge, and the light goes dim or dies early.
Set your multimeter to DC volts and touch the probes across the two battery terminals. A healthy 1.2V NiMH cell reads roughly 1.2V or higher after a day of charging. A cell sitting near zero volts, or one that swelling its holder, is finished.
Match the replacement to what came out. Most garden lights use AA or AAA NiMH at 1.2V; newer ones use a single 3.2V LiFePO4 cell. The voltage has to match or the charge controller will refuse to charge it. Note the polarity marks before you pull the old cell out, because a reversed cell will not charge and can stress the board.
You can drop in a fresh 1.5V alkaline AA for a few hours to see whether the LED still lights, which tells you the fixture itself works. It is a test only. Alkaline cells are not rechargeable, and leaving one in a solar light will eventually leak.
How to tell it worked: the new cell reads at or above its rated voltage after a full day of sun, and the light runs past midnight.
6. Check the sensor, switch, and wiring
The dusk-to-dawn sensor is a small photocell, usually on the top of the housing or under the panel. Cover it completely with opaque tape or a strip of black electrical tape for ten seconds, then release it while the panel is still dark. A working sensor clicks the light on; a sensor that never clicks has failed.
Before you blame the sensor, look for what is confusing it. A wall light, a streetlight, or another solar light shining straight onto the photocell keeps it in permanent daylight mode. Reposition or aim the sensor away from those sources.
The on/off switch itself is a common failure. With a multimeter in continuity mode, probes on the two switch terminals should beep when the switch is on and stay silent when it is off. No beep means the switch is the fault, and a standard micro switch from an electronics supplier is usually the part that replaces it.
Inspect any wiring you can reach, including the thin leads between the panel and the battery compartment. A break here, often from a stake driven through the cable or from flexing at the joint, is repairable with solder and heat-shrink tubing. Never bypass a safety component or join wires you cannot see the ends of.
How to tell it worked: the light turns on when covered, stays off when uncovered in the sun, and holds steady instead of flickering.
7. Reset the light and test it overnight
Some charge controllers lock up after a deep discharge or a dead battery and will not restart on their own. A reset clears that.
Switch the light off, remove the battery, and leave it out for 30 seconds to five minutes. Put it back in, then cover the panel with an opaque cloth for five seconds and uncover it. Leave the light switched to ON in full sun for a complete day before judging it.
Test it at night, ideally through a full evening. A light that comes on and fades within an hour has a weak battery or an underperforming panel, not a broken switch.
How to tell it worked: it switches on at dusk, runs for most of the night, and still responds to its sensor the following evening.
Common Mistakes That Prevent Solar Lights from Working
- Leaving the switch on OFF. The most common reason a brand new light never lights up. Set it to ON and leave it there.
- Forgetting the battery pull tab. The tab breaks the circuit silently. Remove it before the first charge.
- Putting the panel in shade or charging it through glass. A few hours of weak light is not a charge. Move it into open sky.
- Fitting the wrong battery. A 1.5V alkaline cell or a mismatched chemistry will not charge properly. Match voltage and type.
- Leaving corrosion in place. Cleaning deposits off the battery holder, not just the visible battery, restores contact.
- Testing through a dirty or shaded panel. Wipe it and put it in the sun before deciding anything is broken.
- Assuming a dead light means a new one. Most failures are a battery, a switch, or a sensor, and all three are replaceable parts.
Frequently Asked Questions
How do you reset solar lights?
Switch the light off, remove the battery from the compartment, and leave it out for 30 seconds to five minutes. Put the battery back in with the polarity correct, then cover the solar panel with an opaque cloth for five seconds. Leave the switch on ON in full sunlight for a whole day before testing at night. A reset clears a charge controller that has locked up after a deep discharge.
How long do solar light batteries last?
Most rechargeable cells in outdoor solar lights are rated for 300 to 500 charge cycles. Running six hours a night, that works out to roughly two to three seasons before capacity drops noticeably and the light dims or dies early. Cold winters shorten it further, since cold batteries deliver less power. Replacing the cell with the same chemistry and voltage is usually a far better use of money than replacing the whole fixture.
Can I use regular AA batteries in solar lights?
You can, for a short test. A 1.5V alkaline AA will light the LED and tell you whether the fixture and switch work. Do not leave it there: alkaline batteries are not rechargeable, and the solar panel will try to charge them, which causes leakage and corrosion inside the housing. For normal use fit a rechargeable 1.2V NiMH cell of the same size, or the 3.2V LiFePO4 cell the manufacturer specifies.
Why are only some of my solar lights working?
Lights bought as a set are assembled on different days and can differ in panel quality, battery batch, and how long they were left sitting in a warehouse. The ones that fail earliest are usually the ones that were undercharged before you bought them, or the ones sitting in the deepest shade. If several from the same batch fail within weeks, the seller may have a returns policy worth using before you buy replacement parts.
Why won’t my solar lights turn on after rain?
Water gets past an IP65 housing through a drainage hole that has silted up, a cracked seam, or a seal that never closed properly. It then sits against the battery terminals and forms corrosion, which insulates them from the cell. Dry the compartment, scrub the corrosion off with a toothbrush and a vinegar and water solution, add a little contact cleaner, and reseal the housing with silicone before closing it up.
Conclusion
Start at the top and stop when the light behaves. Switch on, pull any tab, wipe the panel, move it into open sky, and give it two or three clear days. If it still will not light, open the housing and clean the contacts, then test and replace the rechargeable battery with a matching 1.2V NiMH or 3.2V LiFePO4 cell. Sensors, switches, and reachable wiring are the next things to look at, and a reset settles a locked charge controller. Most lights that stopped working come back from one of those steps rather than from the bin.