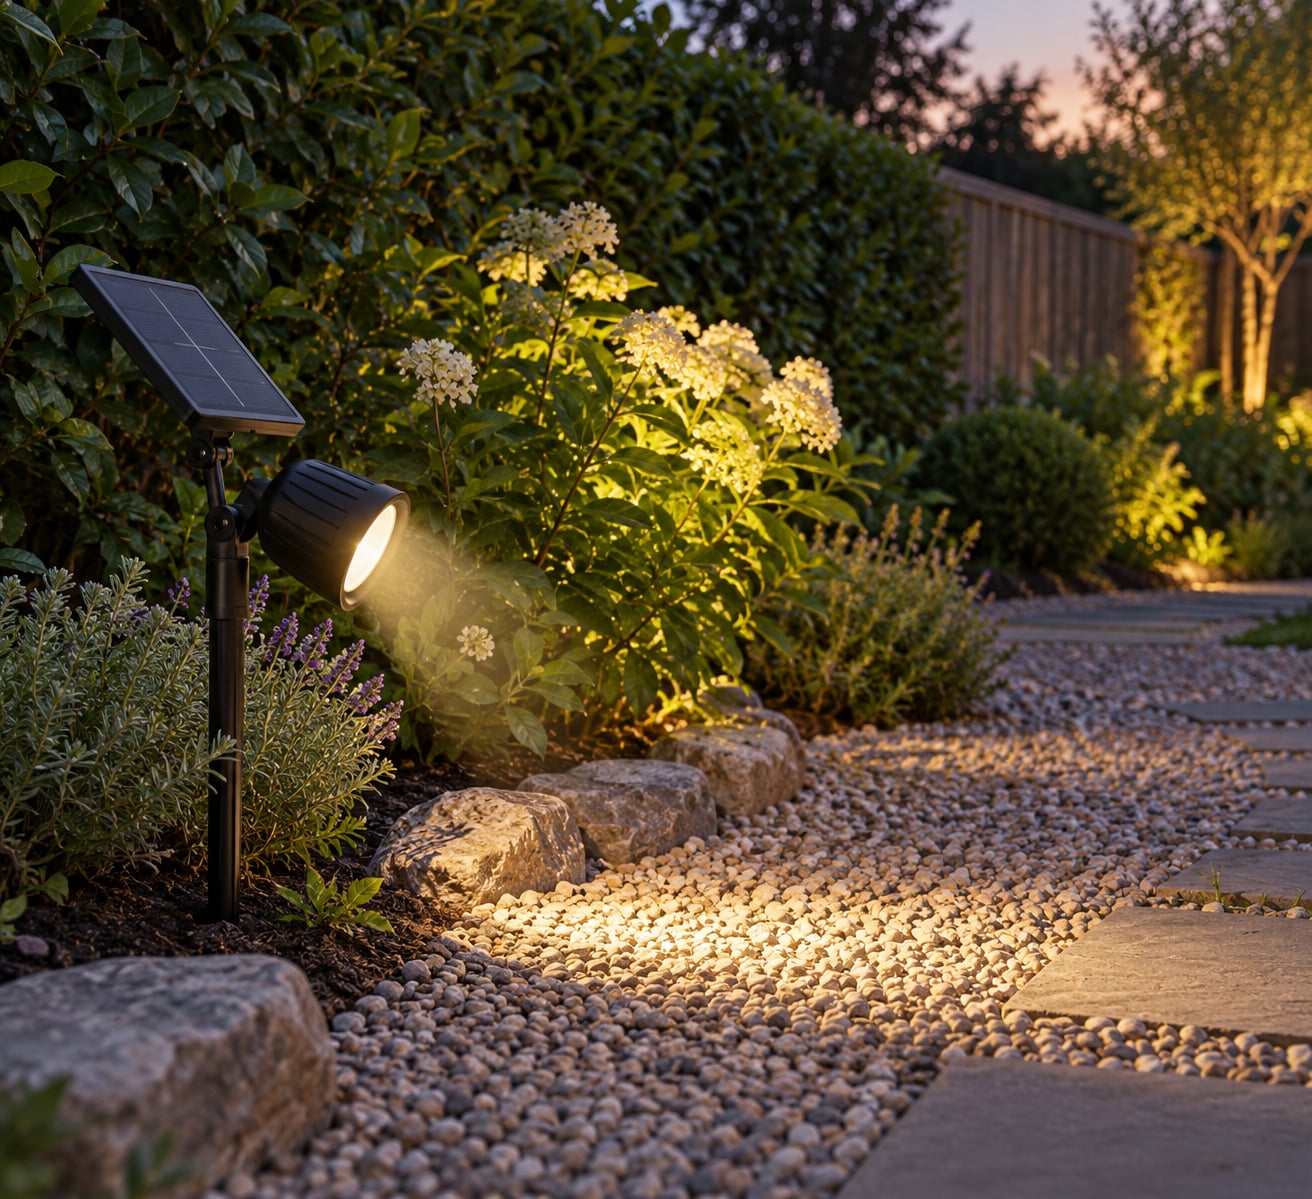
To aim a solar spotlight, loosen the head or its sun-screw collar, rotate and tilt the LED until the beam lands on your target, then tighten it again. Set the panel facing the sunniest part of the sky, switch the light on, and walk the area after dark to check the aim before you bury the stake. The whole job takes about 20 minutes in daylight plus one 10-minute check at dusk.
Most solar spotlights arrive with a fixed beam that points wherever the factory aimed it, which is rarely where you want light. Aimed correctly, the same fixture lights a step, washes a fence or lifts a shrub and stops wasting battery on bare soil or a neighbour’s upstairs window.
Two separate adjustments matter and most people only think about one of them. The head angle decides where the light lands. The panel angle decides how much charge the battery stores. Get the panel right and the light works all night; get the head right and the light actually does something useful.
Table of Contents
- What You Need
- Step-by-Step: How to Aim a Solar Spotlight
- 1. Choose the Best Mounting Location
- 2. Mark the Intended Coverage Area
- 3. Set the Spotlight Angle
- 4. Check the Solar Panel Orientation
- 5. Test at Night and Secure the Fixture
- Common Aiming Mistakes and How to Fix Them
- Frequently Asked Questions
- Which direction should a solar spotlight panel face?
- Should a solar spotlight point up or down?
- Do you charge solar lights in the on or off position?
- Why is my solar spotlight dim even after a full day of sun?
- How many lumens do I need for a pathway or an entrance?
- What if the beam still misses the spot after I adjust it?
- Conclusion
What You Need
You do not need specialist tools. Grab these before you start so the aiming itself is the only job left:
- The solar spotlight itself, with the switch set to ON and any battery pull tab removed
- A stable mounting surface: firm ground for a stake, or a wall, post or bracket for a wall-mounted unit
- A screwdriver or a small wrench, for the sun-screw or the joint bolts
- A small spirit level, or a phone level app
- A flashlight or your phone torch, plus a piece of chalk or tape for marking
- A flat piece of cardboard or a spare block of wood to prop the fixture at trial height
Safety first: if your fixture is hard-wired or clips straight to mains power, stop and call a licensed electrician. Solar fixtures are low-voltage, but the ground stake still carries a trip hazard, and digging near buried cables or irrigation lines is not worth the gamble.
Whatever you do, the manufacturer’s mounting and electrical instructions take priority over anything in this guide. Brands differ on how far a head tilts and whether the stake can be angled without weakening the joint.
Step-by-Step: How to Aim a Solar Spotlight
1. Choose the Best Mounting Location
Pick a spot that gets direct sun for most of the day and has a clear line to whatever you want lit. A fixture that sits under a tree canopy, beside a north-facing wall or under a gutter overhang will charge poorly no matter how well you aim it.
Clear the sightline too. Overhanging branches, a wall or a fence corner will cut the beam off at an angle and create the sharp shadow edge that makes a garden look patchy. Stand where you plan to mount the light and look at the target from that exact viewpoint, not from the middle of the garden.
Give the panel its own sky. Some kits let you run a cable to a remote panel, which is the clean fix when the ideal lighting spot sits in shade. For a wall with no sun, mount the panel above or beside the wall on its own bracket and route the cable to the light.
2. Mark the Intended Coverage Area
Decide the boundary of the area you want lit before you touch the fixture. Walk the path, the steps or the front of the house and mark the spots that stay dark on an ordinary night. Those marks are the ones you are aiming for.
Look for overlapping pools rather than one hard circle. Steps and paths read best as gentle, overlapping patches, so two fixtures angled at the same patch leaves a gap ten feet further along.
Also mark what you do not want lit. Note any bedroom windows nearby, a neighbouring wall, a road or a neighbour’s tree. A beam that spills into a window is light trespass, and it is the fastest way to get a fixture switched off for good.
3. Set the Spotlight Angle
This is the mechanical part people get wrong. Loosen the sun-screw on the front of the head, or the single bolt at the swivel joint, and hold the head rather than twisting the whole body. Rotate for left and right, then tilt for up and down.
Point the centre of the beam at the middle of your marked area, not at one edge. Then step back ten paces and look at the shape of the pool. A narrow beam concentrates the light and suits a tree trunk or a single shrub. A wide beam spreads out and suits a path or a wall.
Light needs a surface to land on. A beam crossing open air produces almost nothing visible, so if you want a shrub lit, aim at the foliage mass and not past it.
Typical working angles and output ranges, matched to what you are lighting:
- Path or driveway edge: aim downward at 20 to 30 degrees, using a wide beam. Roughly 20 to 60 lumens is enough.
- Steps and stairs: aim downward at about 30 degrees with a wide beam. Roughly 20 to 60 lumens.
- Low shrub or flowerbed: aim upward at 30 to 45 degrees with a narrow beam. Roughly 60 to 150 lumens.
- Small tree trunk: aim upward at 15 to 30 degrees with a narrow beam, around a 30 degree spread. Roughly 100 to 300 lumens.
- Fence or retaining wall: run the beam along the surface, nearly parallel to it, with a wide beam. Roughly 60 to 200 lumens.
- Front entrance or gate: aim downward across the approach with a wide beam, ideally with a motion sensor. 200 lumens and up.
Those figures are typical working ranges, not specifications. A fixture listing 300 lumens on paper with a dim battery underneath will read lower in real use, so judge the beam by eye on your own ground rather than by the number on the box.
Hold the angle with a finger while you check it, then tighten the screw or bolt until the head stops moving. Do not overtighten; the thread will strip long before the light needs that much force.
4. Check the Solar Panel Orientation
The panel is a separate axis from the head. In the Northern Hemisphere it wants a southern sky, and in the Southern Hemisphere a northern one, angled up roughly at the latitude of your site rather than flat or vertical.
Where the light has to point and where the panel has to face can disagree, and in that case the panel wins. A spotlight that shines beautifully but dies at 10pm has an aiming problem, not a light problem.
Use the phone compass to check the bearing, then watch the patch of sky the panel sees through the day. If a fence, a bushy tree or the house itself blocks it, either angle the panel around the obstruction or move to a remote-panel setup. Keep the manufacturer’s stated orientation guidance as the final word.
5. Test at Night and Secure the Fixture
Wait for full dark and switch the light on, either manually or by covering the photocell sensor with your hand. Walk the route you marked earlier and look for three things: gaps, glare and hard shadow edges.
Adjust in small increments of one or two feet rather than big swings, and re-check as you go. Watch for glare from the fixture’s own housing, for shadows cast by branches, and for a motion sensor that triggers too late or too eagerly.
Then tighten every fastener, check that water runs off rather than pooling at the panel and switch seam, and press the stake down until it is firm. Leave the unit in its initial setting for two or three full days of direct sun before judging brightness, because a repositioned fixture needs that recovery time.
Common Aiming Mistakes and How to Fix Them
These are the errors that show up again and again, and each has a straightforward fix:
- Aiming too high. The beam sails over the target and lands on a wall, a ceiling or a tree canopy. Drop the head angle until you can see the pool of light on the ground or surface you actually wanted.
- Aiming too flat. A near-horizontal beam stretches its energy over a huge distance and reads as dull everywhere. Tilt down toward the target and let the beam tighten.
- Putting the panel in shade. This is the top reason solar spots look dim. Clear vegetation, move the fixture into open sky, or run a remote panel to a sunnier spot.
- Ignoring obstructions. A single branch or fence corner cuts the beam and throws a hard-edged shadow. Walk the sightline at head height before you settle on an angle.
- Loosening one adjustment and forgetting the other. Most fixtures tilt and rotate separately, and a head that is correct vertically can still be pointing sideways. Check both axes, then retighten both.
- Ignoring glare. If the beam is visible from the street, shield it by tilting down or moving the fixture back. Well-aimed lighting shows the surface, not itself.
- Testing before the battery has charged. A unit straight from the box, or one that has just moved, will look far dimmer than it will in a week. Judge brightness after two to three full days of sun, with the switch set to ON.
- Leaving it ON all day. A light that burns while it charges drains the battery it is trying to fill. Most units want the switch ON for the night and OFF if you are storing or troubleshooting.
One more that is easy to miss: aiming upward into a tree canopy for effect. It looks dramatic and it also throws light at the sky, which can pull moths and other insects away from your beds. Downward, shielded beams with a warm colour temperature around 2200 to 2700K are the wildlife-friendlier choice.
Frequently Asked Questions
Which direction should a solar spotlight panel face?
In the Northern Hemisphere, point the panel toward the southern sky, and in the Southern Hemisphere toward the north, tilted up at roughly your latitude rather than flat or upright. Surrounding buildings and trees often override the ideal direction, so check what the panel actually sees during the day. If the light needs to point somewhere the sun does not reach, use a remote panel on its own bracket.
Should a solar spotlight point up or down?
Point it down for safety and function: paths, steps, gates and driveways look better lit from above and avoid glare for drivers and neighbours. Point it up only for accent work on a shrub, trunk or wall, and keep the beam narrow so the light lands on the surface rather than the open air. Shielded downward beams also disturb insects less.
Do you charge solar lights in the on or off position?
Set the switch to ON for the first full day of sun so the light can manage its own charge, and leave it ON through the night. A light burning while it charges drains the battery it is filling, so switch it OFF during long storage or while you troubleshoot. Remove any battery pull tab first; a tab left in place stops the charge from ever reaching the battery.
Why is my solar spotlight dim even after a full day of sun?
Check the switch position and pull tab first, then look at the panel. Dirt, pollen and leaves cut charging noticeably, and a panel sitting in shade or facing away from the sun produces almost nothing. Clean the glass, remove obstructions and reposition the panel, then allow two to three full days of direct sun before judging the result again.
How many lumens do I need for a pathway or an entrance?
Around 20 to 60 lumens is enough for a path or steps because the light hits a nearby surface. A shrub or fence wash usually needs 60 to 200 lumens, and an entrance or gate you want to light on approach wants 200 lumens and up, usually with a motion sensor. Judge it on your own ground rather than the number on the box.
What if the beam still misses the spot after I adjust it?
Move the fixture, not just the head. If the target sits beyond the beam angle you have, the light is in the wrong place or has too little output for the distance. Repositioning takes one or two feet per check, and the fixture needs two to three full days of sun to recover. If the beam now covers what you want, tighten every fastener and re-test at dusk.
One last thing worth checking each season: the sun sits lower and further along the sky in winter, so a panel that charged well in June may want a small adjustment in December. A quick glance at the shadow cast by the panel at midday tells you in seconds.
Conclusion
Start with the mount: choose a sunny, unobstructed spot, then mark the area that is still too dark after sunset and aim the centre of the beam there. Test the fixture at dusk, nudge the angle a foot or two at a time, and tighten every fastener only once the pool of light sits where you want it.
Follow the product manual for your specific fixture, and re-check the mount and the panel orientation through the year. A well-aimed solar spotlight needs almost no maintenance and puts its light exactly where you asked for it.