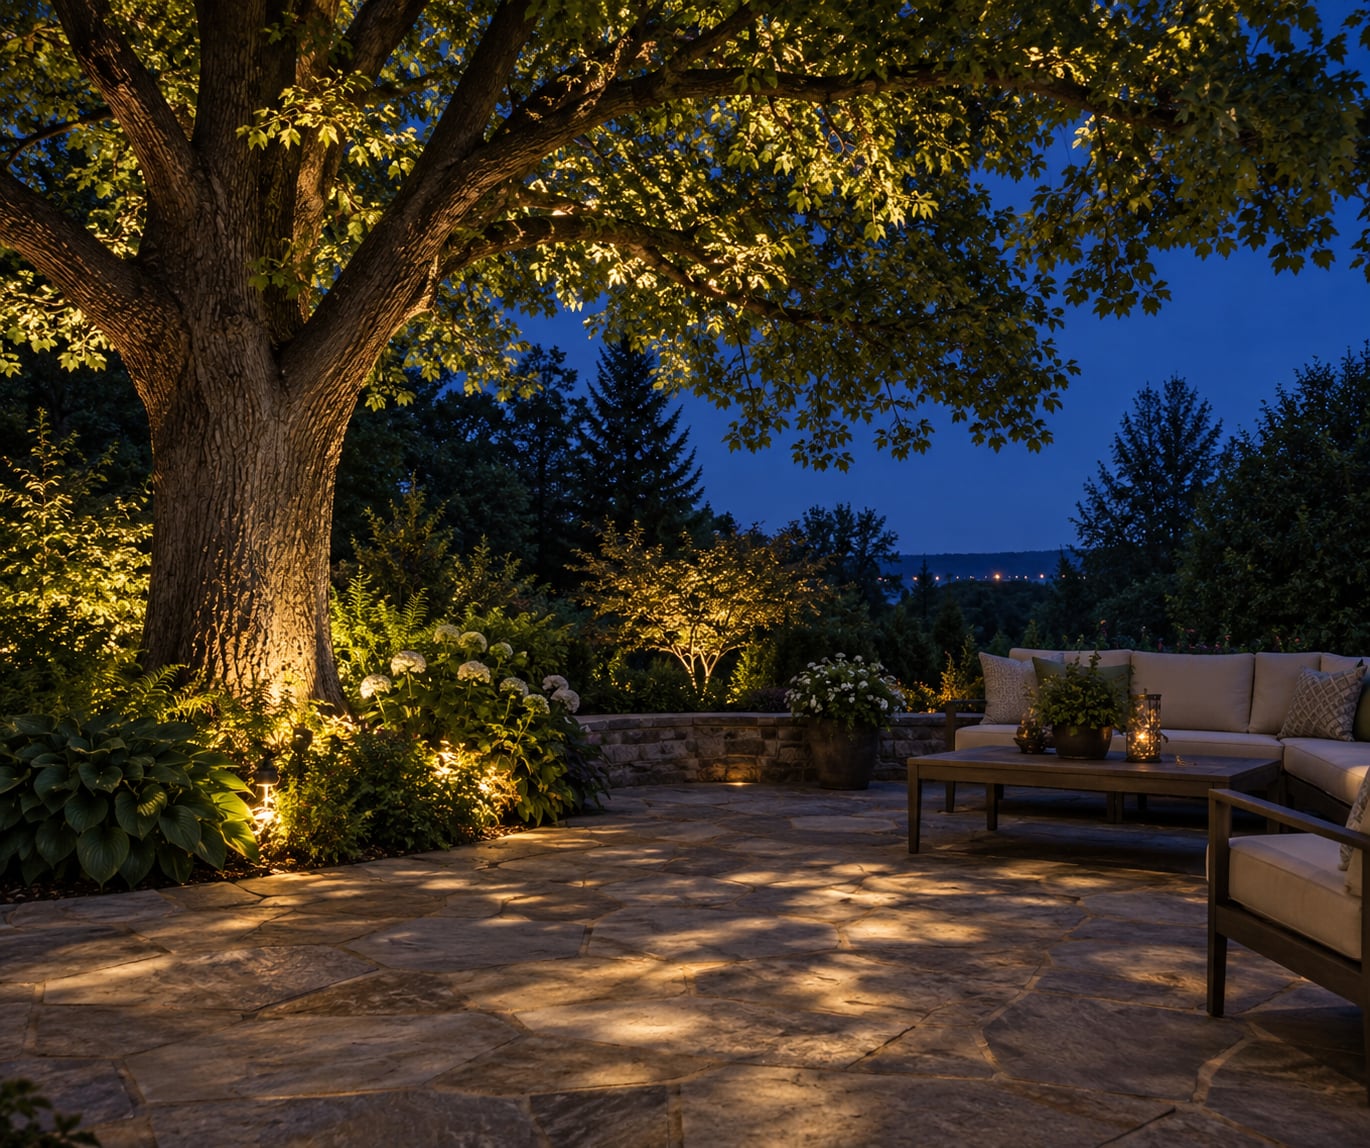
Knowing how to use moonlighting in landscape design comes down to three things: mounting height, color temperature, and glare control. You light the yard from above so the glow comes down through leaves and branches instead of bouncing up off the ground, mounting small shielded fixtures high in a mature tree canopy, on a pergola, or under an eave, and letting the foliage break the beam into soft, dappled patterns. Get those three right and the effect is convincing on the first night.
A single mature tree 20 feet or taller gives you the whole effect with one or two fixtures. A yard with no big trees takes more planning, but pergolas, trellises, eaves, and dedicated mounting poles do the same job. Budget an evening of work for the design and a second evening after dark for the test, which is the part that actually decides how it looks.
Table of Contents
- What You Need
- Step-by-Step: Create a Moonlighting Effect
- How to Use Moonlighting in Landscape Design: Map the Light Paths
- Choose Light Color and Brightness
- Position Fixtures for Soft Silhouettes
- Control Glare, Spill, and Light Trespass
- Compare Moonlighting with Other Landscape Lighting
- Test and Refine the Scene at Night
- Common Mistakes
- Tips for a Subtle Moonlighting Effect
- Frequently Asked Questions
- What is moonlighting in landscape design?
- What plants look best with moonlighting?
- Can I use solar lights to create a moonlighting effect?
- How bright should moonlighting landscape lights be?
- Is moonlighting safe for outdoor electrical installations?
- Does moonlighting replace pathway lighting?
- Conclusion: Start With One Feature Tree
What You Need
Moonlighting is a specific downlighting method. A shielded fixture sits high in a tree, aimed down, and the canopy filters the beam into dappled light and branch shadows on the ground. Contractor training material from Alliance Outdoor Lighting puts the standard mounting height at 20 feet or more, because height is what hides the source and widens the coverage.
Most people need fewer tools than they expect:
- A simple site sketch. Draw the trees, structures, house, and the areas you want lit. Mark roughly where a fixture could sit in each tree.
- Dark-time observation. Go out after full dark and note which trees read best in silhouette and which parts of the yard you actually use.
- A measuring tape. You need fixture height and distance from the trunk, and those two numbers drive beam choice.
- Exterior-rated low-voltage fixtures with shields or hoods, plus a compatible transformer or power supply for a wired system.
- Solar fixtures, if the area gets several hours of direct sun. Solar is genuinely useful in open borders but unreliable under dense canopy, which is exactly where moonlighting wants to go.
- A noncontact voltage tester and the manufacturer’s instructions for whatever you install.
One line matters more than the rest. Low-voltage and solar systems are in a different risk class from mains-voltage lighting. Anything hardwired to household power should go to a qualified electrician, and any outdoor equipment must be rated for its location, especially near water.
Step-by-Step: Create a Moonlighting Effect
Work in this order and you avoid the classic failure of buying fixtures first and then hunting for places to hide them. Design the light path, then the color, then the position, then the glare, and only then look at hardware.
How to Use Moonlighting in Landscape Design: Map the Light Paths
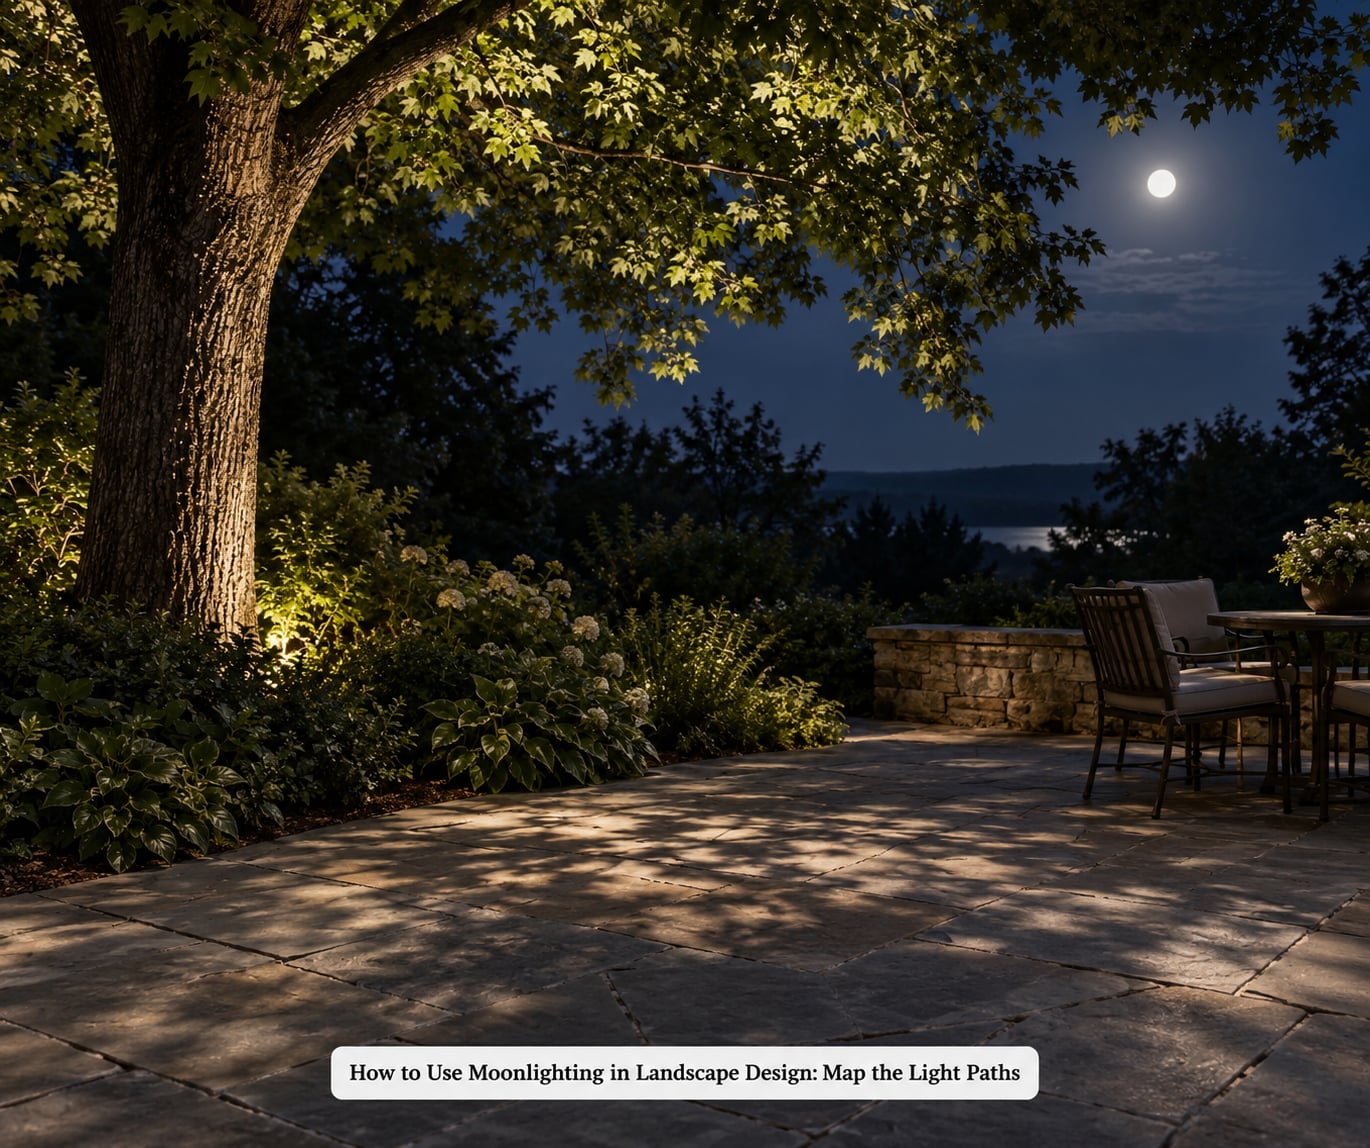
Start after dark, not during the day. Stand where you will usually sit and look up. Every tree that already has an interesting branching shape is a candidate, and the ones that catch moonlight from a neighbouring property or a streetlight are your best references for the look you want.
Sketch where the light should travel, not where the fixture goes. For a canopy mount, the light falls from high inside the branches to a pool roughly the size of a pickup truck on the ground. If your source has to sit at ground level instead, push the fixture several feet out from the trunk so the light spreads through the canopy rather than flaring straight up one side of the bark.
You will know the map is right when each fixture has one clear job: a patio, a path crossing, a wall, or a bed edge. A fixture doing three jobs is usually two fixtures that never got installed.
Choose Light Color and Brightness
Color temperature does more work here than any other single choice. Warm white around 2700K to 3000K reads as gentle and residential. Cooler light approaches a bluish, clinical look that most people describe as harsh, even at low brightness. Forum discussions about the technique keep landing on the same point: a cool-neutral tone close to real moonlight looks authentic, and anything harsher stops reading as moonlight at all.
Brightness is about restraint. The best moonlighting looks dimmer than people expect. If you have to squint at the pool of light, it is too strong. Dimmable fixtures or a low-output lamp let you set the level after dark rather than guessing from a spec sheet.
Beam angle matters as much as lumens. A narrow beam concentrates light into a small hot patch, and a wide beam spreads a fixture’s output thin across the yard. Most single-tree installations work best with a narrow flood, and walls, columns, and sculptural plants take a wider spread.
Position Fixtures for Soft Silhouettes
Spacing and distance decide whether you get moonlight or a collection of bright circles. Aim for gradual brightness: a soft core with the ground darkening outward, not a hard edge you could cut with a knife.
Mature trees want a fixture high in the canopy, aimed down, with the light passing through as much foliage as possible. Ornamental trunks and multi-stem specimens are different problems; those usually work better lit from farther away at a lower angle, so the bark texture reads evenly instead of hot at the base. Large shrubs get one fixture per mass, placed to shape the outline. Walls and sculptural plants take grazing light at a shallow angle to bring out texture.
Spacing fixtures about 8 to 10 feet apart keeps the pools of light overlapping gently. Push them farther apart than that and you get alternating light and dark that reads as an accident rather than a design.
The coverage math is simple enough to do on the back of an envelope. Coverage diameter is roughly twice the mounting height times the tangent of half the beam angle. A 36-degree beam at 20 feet covers about 13 feet across; a 60-degree beam at the same height covers roughly 23 feet. Work that out before ordering and you will know how many fixtures a tree actually needs.
Whatever height you choose, keep the fixture out of sight from the house, the street, and the seating area. A glowing hood at eye level destroys the effect in one second.
Control Glare, Spill, and Light Trespass
Glare is the number one complaint in homeowner discussions about outdoor lighting, and it comes down to two things: whether you can see the lamp, and whether light lands where you did not intend.
Aim light upward and outward only as far as the target requires, and keep the beam off the horizon wherever you can. Use fixtures with shields, hoods, or deep shrouds, and choose a narrower beam when a wide one pushes light past the target. A hood that hides the lamp from a standing eye height is usually worth more than any brightness reduction.
Then handle the edges. Dimming or switching off a whole zone beats trying to fine-tune a fixture that is too bright. Keep light off neighbouring windows, and check the boundary from the sidewalk rather than from inside the yard, because that is the angle nobody controls.
Compare Moonlighting with Other Landscape Lighting
Moonlighting is one technique among several, and it does not replace all of them. The table below shows where the light comes from, what it looks like, and where each technique earns its place.
| Technique | Light source | Effect | Best for |
|---|---|---|---|
| Moonlighting | High in a canopy, aimed down | Dappled light and branch shadows | Mature trees, patios, pool decks |
| Uplighting | Ground level, aimed up | Trunks and walls loom upward | Tall trunks, columns, facades |
| Downlighting | Eave, soffit, or overhead | Even light on surfaces below | Paths, steps, seating areas |
| Path lighting | Low bollards along a route | Pools of guidance light | Walkways and driveways |
| Shadowing | Aimed at an object from a distance | Enlarged shadow on a wall | Small trees, shrubs, sculpture |
Where moonlighting earns its place is atmosphere: a large area, softly lit, with almost no visible hardware. Where it does not is safety. It is a terrible guide light for a path edge and a poor substitute for step lighting, because the source is high and the beam is wide. Keep path and stair lighting separate and dimmer-friendly, and the yard still reads as one space.
Test and Refine the Scene at Night
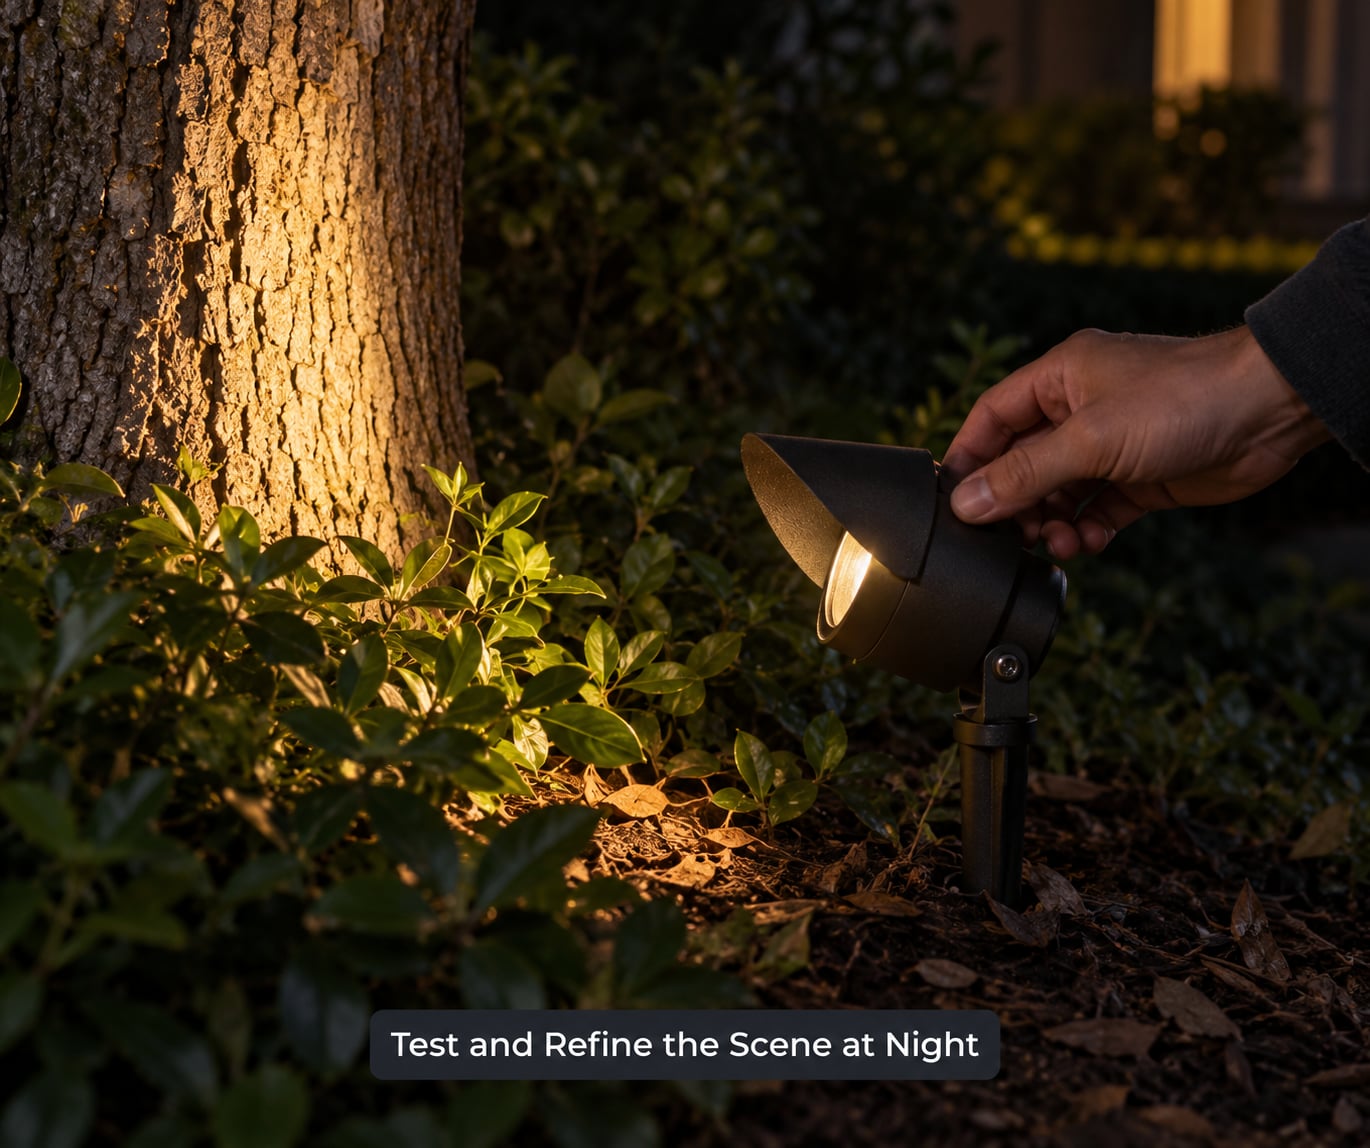
Every adjustment should happen in the dark, which is the one step most people skip. Turn on the new zone, walk the same path you walked during the mapping step, and look up from the seats you actually use.
Fix what you find rather than adding fixtures. Tilt a beam to pull it back off a wall, drop the output a notch, add a hood where you can see the lamp, or shift a fixture a foot sideways to soften a hard edge. Dimmer switches and timers let you set the final level after the fact, which saves a lot of rewiring.
Follow the manufacturer’s instructions for whatever you installed, and avoid looking directly into a bright fixture even while aiming it. If you need to work at height or near mains power, that is the point to bring in a professional.
Common Mistakes
Almost every disappointing moonlighting yard has the same handful of causes, and none of them are about the quality of the fixture.
- Overcrowding. Too many fixtures turn a soft effect into a lit room. Start with one or two feature trees and add only when the dark areas actually bother you.
- Overly bright lamps. Brightness that looks right in a dark showroom looks like a floodlight outdoors. Choose the dimmest output that reads, and use dimming later.
- Cool blue light. Very cool white reads as a parking lot, not moonlight. Staying in the warm range of roughly 2700K to 3000K keeps the atmosphere soft.
- Exposed hardware. Visible wires on the trunk, across beds, or along a fence line are the most common deal-breaker in owner reviews. Plan the cable route and slack before you mount anything.
- A visible lamp. If you can see the source from the house or the street, the effect is over. Shields, hoods, and higher mounting solve most of it.
- Excessive spill. Light crossing a property line or landing in a neighbour’s window causes complaints and, in some places, fines. Check from outside your own yard.
- Poor plant and site choice. Thin, sparse foliage produces a weak effect, and so does a fixture mounted below a dense lower canopy where it lights leaves and nothing else.
- Unsafe wiring. Undersized wire on a long run causes voltage drop and uneven brightness, and buried cable in a bed gets cut by the next landscaping crew. Follow the wiring gauge, depth, and burial requirements that come with the system.
Trees also grow. A fixture aimed correctly in spring can point at the neighbour’s fence in a few years, so leave slack in the cable, use mounting hardware that can be re-aimed, and plan to re-check aim every year or two.
Tips for a Subtle Moonlighting Effect
- Begin with a single feature tree. One good silhouette teaches you more than a whole yard of guesswork.
- Vary intensity across the yard instead of matching it everywhere. Contrast is what makes the effect look natural.
- Use timers or dusk-to-dawn controls so the system runs when you want to be outside, not all night.
- Pick solar fixtures only where the spot gets direct sun. Under heavy canopy they will dim every evening.
- Check your local lighting rules and any dark-sky guidance before designing upward or outward spill.
- Re-aim in two seasons, since canopy density and leaf cover change how much light reaches the ground.
Frequently Asked Questions
What is moonlighting in landscape design?
Moonlighting is a downlighting technique where shielded fixtures are mounted high in a mature tree canopy, usually 20 feet or more, and aimed straight down. The foliage breaks the beam into soft, dappled light and branch shadows on the ground, imitating natural moonlight. The high mounting height also hides the source from view, so you get a large lit area with almost no visible hardware.
What plants look best with moonlighting?
Mature deciduous trees with open branching structure give the strongest result, because light passes through leaves and limbs and scatters. Multi-stem ornamental trunks and large shrubs also work well at lower angles. Avoid dense evergreen screens and heavy undergrowth, which absorb light and leave you paying for fixtures that produce almost no visible effect.
Can I use solar lights to create a moonlighting effect?
You can, with one condition: several hours of direct sun reaching the fixture each day. Under a mature tree canopy, which is exactly where moonlighting wants to go, solar panels charge poorly and the lights will dim or shut off early. Solar is a good fit in open borders with fewer competing shadows; a low-voltage wired system gives you steadier output under the canopy.
How bright should moonlighting landscape lights be?
Dimmer than most people expect. The effect should read as a soft wash with visible shadow patterns, not as bright pools of light. If the ground detail is clearly lit across a wide area, drop the output or add dimming. Narrow beam angles concentrate what brightness you have instead of spreading it thin, and shielded housings cut glare without reducing output on the target.
Is moonlighting safe for outdoor electrical installations?
Low-voltage and solar systems are well suited to this work, but anything connected to household mains power should be installed or checked by a qualified electrician. All outdoor equipment must be rated for its location, especially near water, and buried cable has depth and burial requirements that protect it from digging. Follow the wiring gauge and transformer instructions that come with your system.
Does moonlighting replace pathway lighting?
No. Moonlighting is ambient light from a high source with a wide, soft beam, which is poor at showing the edge of a step or the exact line of a path. Keep dedicated path and stair lighting, mounted lower and shielded, and run it dimmer so the two layers read as one yard rather than a lit walkway inside a dark garden.
Conclusion: Start With One Feature Tree
Pick the one tree with the best branching shape, mount a shielded fixture at 20 feet or higher, aim it down, and set it warm and dim. Look at it from your usual seat after full dark before you buy a second fixture.
That single exercise is the whole method: map the light path in the dark, choose color and brightness you can live with, space fixtures about 8 to 10 feet apart for gentle overlap, and control what spills beyond the target. Get those four right and how to use moonlighting in landscape design becomes a matter of repeating the effect rather than guessing at it. Add path and stair lighting separately, and re-aim as the tree grows.